How to Remove the Extruder Screw from the Barrel Without Damage
How to Remove the Extruder Screw from the Barrel Without Damage
Introduction to Removing Extruder Screws Safely
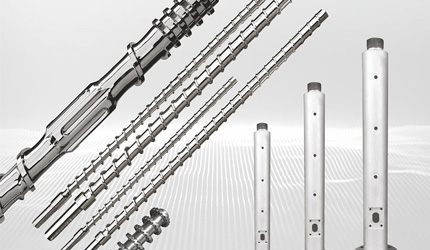
The extruder screw is a proper trooper in any extrusion setup. It pokes, melts, and shapes materials like plastic or rubber inside the barrel. Over time, muck like sticky goo, wear, or heat swings can make the screw a real bear to tug out. I’ve seen folks wrestle with these beasts, muttering like they’re trying to tame a wild mule, and if you don’t take it easy, you could wreck the screw or barrel, costing you a heap of cash in repairs and freezing the factory solid. Doing it right keeps everything running smoothly like a lazy river. At CHUANGRI SCREW, we hammer out steel-strong screws and barrels that stand up to the meanest conditions. Our gear doesn’t need constant pampering, keeping factories chugging along nicely and steadily.
Why Proper Screw Removal Matters
Pulling the extruder screw the right way is a real triumph to keep the screw and barrel in top shape. If you’re not careful, the screw might get all banged up or bent, which throws the whole extrusion system into a proper tangle. Roughed-up screws or barrels can ruin product quality and stop production quicker than a busted belt. Also, a screw tugged out wrong might not slide back in right, making things less slick. I’ve heard stories of folks rushing this and landing in a right pickle, kicking themselves for not taking their time. Following the right steps keeps your equipment sturdy as an old oak, saves you from massive repair bills, and skips over production hiccups.
Common Challenges in Screw Removal
A few bumps can show up when pulling out an extruder screw:
-
Material Buildup: Plastics, rubber, or other materials can pile up around the screw over time. This muck can stick the screw to the barrel like it’s slathered in honey, making removal a real pain in the neck.
-
Corrosion: Sizzling heat or harsh chemicals can cause rust on the screw or barrel. This makes it a bit tougher to tug the screw out without doing damage.
-
Thermal Expansion: Heat swings can make the screw and barrel puff up or shrink, creating a tight grip. You need to handle it gently, like a morning mist, to loosen and pull the screw without harm.
Preparation Steps Before Removing the Extruder Screw
Before you dive in, take some steps to stay safe and keep damage risks way down.
Safety First: Key Precautions to Take
First, make sure that the extruder is shut down and cooled to the core. Individuals try to pull a screw when it’s hot and it’s a surefire way of getting burned or ruining the components. Let the extruder have a lot of time to cool down to a safe temperature before starting. Be sure to also wear proper safety gear, i.e., heat-resistant gloves and safety glasses, to shield yourself during the process.
Inspecting the Equipment
Before pulling out, get a good look at the screw, barrel, and all the small bits. Look for wear, damage, or sludge accumulation that will make them harder to remove. Check for rust or other problems that must be fixed ahead of time. Discovering these issues before hand lets you prevent further damage and makes removal a whole lot simpler.
Step-by-Step Guide to Remove the Extruder Screw
Once everything’s set, follow these steps to tug the extruder screw without any fuss.
Loosening the Die Head and Nozzle
Start by popping off the die head and nozzle to get to the screw. This lets you see the screw as clear as a bright noon and makes sure nothing’s blocking the way. The die head and nozzle can be bolted down as tightly as a jam jar, so grab the right tools, like a wrench or socket, to loosen them with care. Taking these parts off also lets you clean the extruder and tackle any upkeep needed.
Using the Right Tools for Extraction
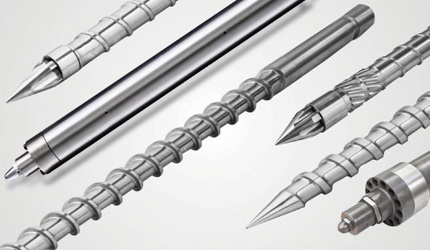
The best way to tug the extruder screw is with special tools, like a screw removal flange or threaded rod. These tools apply steady pressure to ease the screw out without hurting the screw or barrel. Having the right gear is a total must to avoid bending or scratching anything. For smaller screws, manual tools might do the trick just fine. You can gently tap or twist the screw with a rubber mallet or wrench to loosen it. Keep the pressure even to avoid damage. If the screw’s stuck because of muck or rust, you might need a smidge more push, but go slow to avoid bending the screw or smashing the barrel.

Post-Removal Inspection and Cleaning of Extruder Components
Once the screw’s out, check and clean both the screw and barrel to make sure no damage happened and the extruder’s ready for the next job.
Inspecting the Screw and Barrel
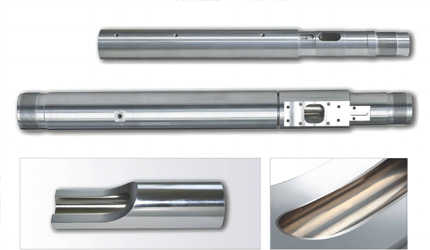
Take a good peek at the pulled-out screw for wear, rust, or damage, especially on the threads. Any problems need fixing before you put the gear back together. Also, check the barrel for scratches or damage where the screw was touching. If the barrel’s beat up, it might need repair or replacement to avoid headaches during production.
Proper Cleaning Techniques After Removal
Cleaning the screw and barrel after tugging it out is a big deal to keep equipment in top shape. Use soft brushes and cleaning solutions made for extruder parts to clear out muck and dirt. Steer clear of course tools or harsh chemicals that could scratch or otherwise damage the screw or barrel surfaces. Regular cleaning avoids grime from building up later, allowing screws to be removed with less inconvenience.
Preventing the Need for Frequent Screw Removal
The best way to avoid yanking the screw all the time is by setting up a super solid upkeep plan. Routine cleaning and checking the extruder can make the screw and barrel last way longer, keeping things running fantastically and cutting downtime.

Implementing Regular Cleaning Routines
Set up a cleaning routine after each production run to stop muck from building up around the screw. Regular cleaning keeps the screw and barrel in great shape and prevents clogs that make removal tougher. Cleaning after each use cuts down on the need for bigger upkeep jobs down the road.
Using Purging Compounds
Purging compounds are a real godsend for keeping the extruder clean and cutting down on screw removal. They purge residual material from the screw and barrel, cleaning easily and reducing muck that tends to clog the screw. Frequent application of purging compounds during production prolongs the life of the screw and barrel.
FAQ
Q: Why is it necessary to remove the extruder screw in a way that does not damage it?
A: Correct removal of the screw maintains screw and barrel integrity. Damage can result in expensive repairs, downtime, and poor product quality in future runs.
Q: What are the tools that are recommended for removing the screw?
A: Specialized tools like screw removal flanges, threaded rods, and hydraulic presses are safest for removal. Manual removal tools like a rubber mallet or wrench will do for small screws.
Q: How often does screw removal become necessary?
A: Remove the screw when there’s a thick accumulation of muck or you notice visible wear. You can minimize how often removal is necessary with regular cleaning and maintenance.
Q: Can the screw be cleaned without removing it?
A: Yes, both barrel and screw can be cleaned during normal runs using purging compounds, minimizing the need for total teardown and preventing muck from staving off.
Q: What is to be done so that in the future screw removal is not required?
A: The minimum screw removal is obtained by cleaning regularly, purging with purging compounds, and checking the extruder performance. Proper maintenance and material handling ensure longer screw and barrel life and reduce downtime.


